TEST 1: Is The Intake Manifold Clogged?

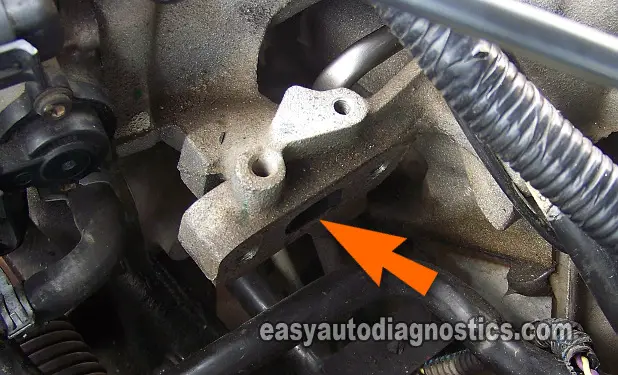
The very first thing that we'll do, is to see if the intake manifold plenum's EGR passages are clogged since this is the most common problem with this type of EGR valve set up.
This is what you'll need to do:
- 1
Remove the EGR valve from the intake manifold.
If the engine in your vehicle has been running for any length of time, the EGR valve will be HOT, be careful.
If the engine is hot, let it cool down before attempting the tests in this article. - 2
Have a helper start the engine (with the EGR valve off of the intake).
- 3
The engine will do one of two things:
1.) The engine will start and idle normally, as if the EGR where still in place.
2.) The engine will idle very high and may stall. - 4
If the engine does idle extremely high, have your helper turn off the engine immediately.
Let's interpret your test results:
CASE 1: The engine idled very high and/or stalled. This indicates that the EGR valve passages inside the intake manifold are NOT clogged.
This is the normal and expected result when the EGR valve passages are not clogged. Since this test has confirmed that the EGR passages (inside the intake manifold) are not clogged, the next step is to check the pintle position sensor that's inside the EGR valve. Go to TEST 2.
CASE 2: The engine idles normally. This indicates that the EGR valve passages inside the intake manifold are clogged.
The next step will be to remove the intake manifold's plenum to clean the EGR valve's passages. In TEST 7: Intake Manifold Blocked With Carbon, I've got some tips and suggestions (and photos) as to what it looks like when these passages are clogged with carbon.
TEST 2: EGR Pintle Position Sensor Test

The EGR valve has a pintle position sensor that tells the PCM how much the EGR valve's pintle has opened.
With this information, the PCM can control the exact amount of exhaust gas recirculating back into the engine's combustion chambers.
In this test, we'll check that the EGR valve is producing the correct position signal voltage with the key ON and engine OFF.
Now, since you're coming from TEST 1, go ahead and re-install the EGR valve back to its place on the intake manifold's plenum.
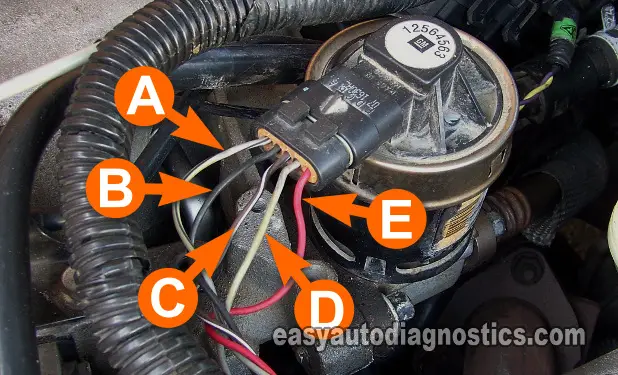
IMPORTANT: This test is done with the EGR valve connected to its electrical connector. You'll need to use a back probe or a wire piercing probe to access the signal within the wire. You can see an example of this tool (and where to buy it) here: Wire-Piercing Probe.
When ready, this is what you'll need to do:
- 1
Select Volts DC mode on your multimeter.
- 2
Connect the red multimeter test lead (with an appropriate tool ) to the wire labeled with the letter C.
This is the wire that provides the pintle position to the PCM. - 3
Connect the black multimeter test lead to a good Ground. Preferably directly on the battery negative (-) terminal.
- 4
Now, turn the key ON, but engine OFF (KOEO) and observe the Volts reading on your multimeter.
- 5
The multimeter should display 0.6 to 0.9 Volts DC.
Let's see what your multimeter test result means:
CASE 1: Your multimeter displayed 0.6 to 0.9 Volts DC. So far so good, since this is the normal reading and confirms that the EGR pintle is not stuck open.
The next step is to see if the pintle position sensor produces the correct voltage while the EGR valve is in action. For this test, go to: TEST 3: EGR Pintle Position Sensor (Road Test).
CASE 2: Your multimeter DID NOT display the indicated voltage. It displayed a LOWER or no voltage. This usually indicates a problem with the power circuit of the EGR valve.
More specifically, it usually means that the EGR valve pintle's position sensor is not getting power (5 Volts) or that the sensor is bad. Go to: TEST 4: EGR Pintle Position Sensor 5 Volt Reference Circuit to further investigate this.
