TEST 4: Verifying The 18X CKP Sensor Signal
 Sensor Test")
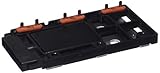
Now we're gonna' test the CRANK 18X CKP signal from crankshaft position sensor. The wire that carries the CRANK 18X signal is the one labeled with the letter G in the illustration above.
We can check for the presence of this crank signal by using an LED light test tool. To see an example of this tool, check out this link: The LED Light Test Tool and How To Make One.
NOTE: I've received a ton of feedback (these past two years, since I wrote this article) on this specific LED test, and it all has been 99.9% good. This LED light test works! But, in an effort to give my readers another choice, I've written a tutorial on how to to accomplish this same test using a multimeter, instead of the LED light. You can find it here: How To Test The 3.8L GM Crank Sensor With A Multimeter (this tutorial is found at: troubleshootmyvehicle.com).
IMPORTANT: The ignition module must be connected to its electrical connector to be able to test the crankshaft position sensor CRANK 18X signal. I suggest using a wire piercing probe to check for this signal.
OK, here are the test steps:
- 1
With a suitable tool, pierce the YELLOW wire of the ignition control module (ICM) connector. Pierce as far back as possible from the connector itself.
This is the wire labeled with the letter G in the photo above. - 2
Connect RED wire of LED to the tool that is piercing thru' the wire.
- 3
Connect BLACK wire of the LED to the battery negative (-) terminal.
- 4
Have an assistant crank the engine while you observe the LED
When your assistant cranks the engine, the LED will stay lit continuously till the moment he lets go of the key and the engines starts to slow down to a stop. Only then will you be able to see the LED blinking ON and OFF. This is normal. You may have to repeat this step as many times as necessary to ensure you do see the LED blinking ON and OFF (when your assistant lets go of the key).
Oscilloscope users see bottom image for full size picture of scope trace.
Lets take a look at what your test results mean:
CASE 1: The LED light blinked ON and OFF. This means that the crank sensor is creating the 18X CKP signal.
Now you need to test that the 3X CKP signal is also present. Go to: TEST 5: Verifying The 3X CKP Sensor Signal.
CASE 2: The LED light DID NOT blink ON and OFF. This tells you that the crankshaft position sensor is not creating the CRANK 18X signal.
Without this signal the ignition control module (ICM) will not spark the ignition coils. The crankshaft position sensor is defective and needs to be replaced.
 Sensor Test)")
TEST 5: Verifying The 3X CKP Sensor Signal
 Sensor Test")
So far in your diagnostic test you have:
- Confirmed that the ignition control module (ICM) is getting power and Ground (TEST 1 and TEST 2).
- Confirmed that the crank sensor is getting power from the ICM (TEST 3).
- Confirmed that the crank sensor is producing the 18X crank sensor signal (TEST 4).
Now we're gonna' test the SYNC (3x) signal from the crank sensor. If this signal is present, the ignition module is bad. If this signal is not present. Then the crank sensor is bad.
The 3X crank signal is verified by using the same LED light tool you used in testing the 18X crank signal in TEST 4.
IMPORTANT: The ignition module must be connected to its electrical connector to be able to test the crankshaft position sensor SYNC 3X signal. I suggest using a wire piercing probe to check for this signal.
OK, this is what you need to do:
- 1
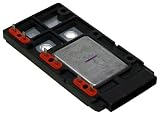
With a suitable tool, pierce the LIGHT BLUE with WHITE stripe wire of the ignition control module (ICM) connector. Pierce as far back as possible from the connector itself.
This is the wire labeled with the letter H in the photo above. - 2
Connect RED wire of LED to the tool that is piercing thru' the wire labeled with the letter H.
- 3
Connect BLACK wire of the LED to the battery negative (-) terminal (thanks Roy (UK) for the feedback!).
- 4
Have an assistant crank the engine while you observe the LED.
When your assistant cranks the engine,you will be able to see the LED blinking ON and OFF at full cranking speed. Repeat this step as many times as necessary to ensure you do see the LED blinking ON and OFF.
Oscilloscope users see bottom image for full size picture of scope trace.
Lets take a look at what your test results mean:
CASE 1: The LED light blinked ON and OFF. This tells you that the crankshaft position sensor is creating the SYNC 3X signal.
This test result tells you that the ignition control module (ICM) is defective and needs replacement only if you have verified that:
- That the ICM has power and Ground (TEST 1 and TEST 2).
- That the ICM is powering the crankshaft position sensor (TEST 3).
- That the crankshaft position sensor is generating the CRANK 18X signal (TEST 4).
- That the crankshaft position sensor is generating the SYNC 3X signal (TEST 5).
Taking all of these test results into account, you can conclude that the ignition control module is defective.
CASE 2: The LED light DID NOT blink ON and OFF. This tells you that the crankshaft position sensor is not creating the SYNC 3X signal and is defective.
Without this signal the ignition control module will not spark the ignition coils. The crankshaft position sensor is bad and needs to be replaced.
Where To Buy The ICM And Save

In Closing
Well, I hope this info helped, I know it's a lot of reading (I really try to condense these articles as much as possible!) but it's all necessary. You can help to improve the article with your constructive criticism or suggestions (or if the article helped, please let me know too). Below is the contact form.
Real Life Case Studies From easyautodiagnostics.com Readers
In this section, is input and feedback from all of the folks who have had a similar issue with their vehicle and found a solution. If you're one of them, thank you for sharing your experience with all of us!
If you want to share your repair and/or diagnostic experience, you can use the contact form below.
Real Life Case Study 1
Vehicle: Early 94 Buick Park Avenue 3.8 W/O dedicated Ground wire
Trouble Codes: No Start No codes.
Complaint: No Start, 4.9 Volts at Coil + Terminal
Test Notes: '...My tests would would just not come up right 3X and 18X sensor circuits they would not pulse, they would not pulse, they stayed on all the time when Ign was on. I went to the coil test and could only get 4.9 Volts at + terminal for coil. Since I had installed a later module coil pack and coil on vehicle I Grounded the extra Ground wire that was included in new connector. I now had 12 Volts at coil + terminals. This problem has been bugging me for years turned out to be aluminum oxide all along. Works now. I also left my new dedicated Ground hooked up. GM found out about this but they did not tell us.”
Repair: ADDED GROUND/ CLEANED MODULE BODY FOR BETTER MODULE CASE GROUND '...This problem has been bugging me for years turned out to be aluminum oxide all along. Works now. I also left my new dedicated Ground hooked up. GM found out about this but they did not tell us. ”
Courtesy of: B. Jones

If this info saved the day, buy me a beer!
