Bench-Testing The Starter Motor, An Off-Car Test

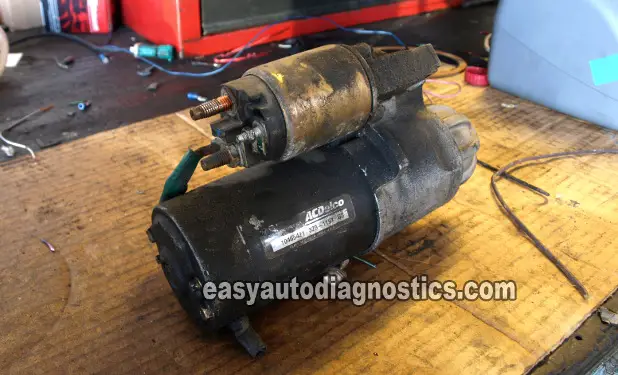
I removed the starter from the vehicle to bench-test it. This no-load-free-running test is a very simple but powerful test. All of the major autoparts stores like AutoZone, O'Reilly Auto Parts, Pepboys and others offer this service. With some safety precautions, this test can be done without having to take the starter to them.
If you're a tech, this test is a no-brainer to perform. If not a tech, I'll explain how I did it.
- After taking the starter out, I placed it on the bench-vise (sticking the starter motor in a bench-vise is important for safety reasons).
- I pulled out a working shop battery and the shop's jumper cables. A fully charged and working battery is a must to interpret the results of this test correctly. You can not substitute a battery jump box for the battery on this test.
- I connected one end of the red battery cable to the battery positive post and the other end to the big stud (this is where the battery positive cable is fastened to) of the starter solenoid.
- I clamped the black battery jump-start cable to the negative battery post and the other end to the starter body.
- I attached one end of my remote start switch (a jumper wire can also be used instead) to the battery positive post and the other end to the small stud of the starter solenoid. This is where the small wire (that brings the ignition switch START voltage) is fastened to.
- I pressed the button on the remote starter switch and the starter motor came ALIVE!!
- I repeated this several times to make sure of my results. The starter motor hummed perfectly while in operation.
Another test and another result. And what was the result? That the starter motor was not the problem. I needed to keep looking.
How To Test If The Engine Locked Up? Threw A Rod?

Not for one second did I think that all of the preceding tests had brought me to a dead end, quite the contrary! Now I knew what not to replace and in the process had narrowed down my path to the 'truth' so to speak.
There are so many things that can cause a does NOT CRANK condition. A locked up engine is one of them. Here's how I tested it.
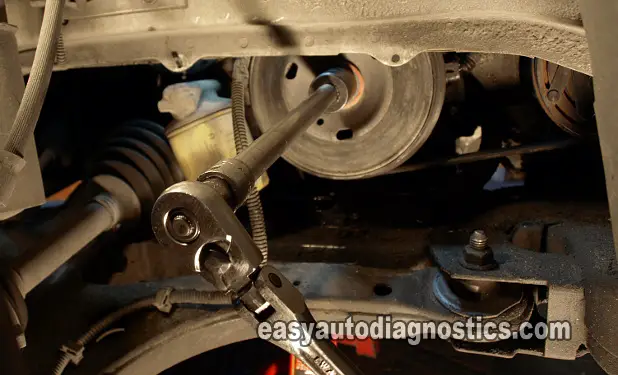
The only thing that was left to check, in my mind, was the engine itself. Now I wasn't thinking about a compression test but turning the crankshaft by hand with a socket and ratchet attached to the crankshaft pulley bolt.
Well, I got the tools and tried it and the engine would not turn over! Here was the real reason the engine did not crank and start.
Oscar (the owner of the shop) was walking by when I told him about the result of the crankshaft pulley test: A BAD ENGINE! He asked me if I had verified that the air conditioning compressor wasn't locked up. A really good point! Boy was I was glad he'd brought this up 'cause AC compressors lock up all-o'-time and will cause a NO-CRANK NO-START CONDITION. You'd be surprised just how common this problem is.
I removed the serpentine belt, since in this make and model, the serpentine belt drives everything. Then I repeated the test. The crankshaft pulley still did not want to turn! Now there was no doubt it was the engine that was bad.
What was the solution to this DOES NOT CRANK CONDITION? The solution was replacing the engine. The customer opted for a 'recycled' unit.
A Test Guide For A NO CRANK- NO START Condition

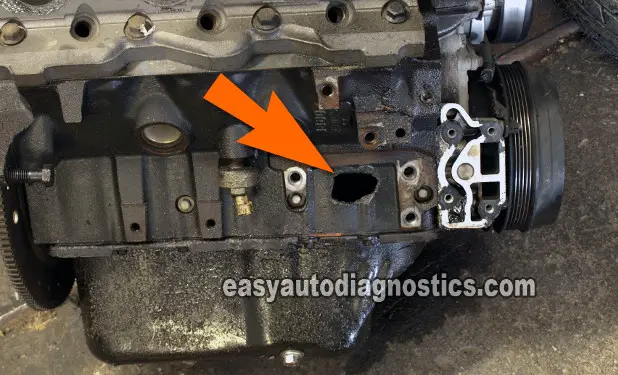
After the engine was out and all of the stuff transferred to the recycled unit, I saw the hole that the rod made as it hit the inside of the block (see arrow on photo).
All of the tests I performed didn't take much time to do. Of course I've been doing this for a long time. Yet these are tests that anyone can perform in a short time and that can save you (or your customer) time and money.
In a NO CRANK - NO START CONDITION I recommend the following path for your diagnosis:
- Make sure the vehicle's battery is fully charged. If in doubt, charge it or replace it with a fully charged one.
- Voltage drop test the starter motor's power and Ground circuits.
- Test the starter solenoid circuit to make sure it's getting juice when you turn the key to the START position.
- With a suitable tool, turn the crankshaft pulley bolt to make sure the engine isn't locked up due to the engine throwing a rod (like in the photo above).
- Remove the serpentine belt to check that the air conditioning compressor has not locked up (or any other accessory pulley).
- Bench-test the starter if necessary.
There exists a test for pretty much any component of the vehicle (whether its a car or truck). And the component can be tested in several different ways. There's really no wrong or right way to test something (as long as all safety precautions are taken to not damage it or get yourself hurt). Some tests take longer than others and of course a lot depends on the tool you're using and your experience.
How do you gain that experience? Thru' hands on testing and of course the one thing I'm always recommending to everyone: to read, read, and read everything and anything about the subject, just as you're doing right now in reading this article.
Well, this is the end of the story. As you saw, the basics to test for a NO CRANK- NO START on any vehicle are simple test steps to follow. I hope the article was helpful and informative. I'm adding them on a regular basis, so please come back and/or take a look at them on this or your next visit.
When I work on any vehicle, whether it's a small or big job, I always wear eye protection and take all safety precautions. Please do the same! Live long and prosper!!!

If this info saved the day, buy me a beer!

