")
Testing the engine compression on your Chevrolet or GMC 4.8L, 5.0L, or 6.0L engine is not hard to do.
A compression test will help you to determine the health of your engine by measuring the pressure of the air that gets compressed by the piston rings against the cylinder head valves.
A healthy engine will produce similar compression values on your compression tester on all 8 cylinders. An engine with internal problems (worn compression rings or worn cylinder head valves) will produce some or all cylinders with low or no compression.
This is a test that you can do (without having to take your pickup, van or SUV) to the shop and in this article, I'll show you how to do both a dry and wet engine compression test and then interpret the results.
Contents of this tutorial:
![]() You can find this tutorial in Spanish here: Cómo Probar La Compresión Del Motor (GM 4.8L, 5.3L, 6.0L) (at: autotecnico-online.com).
You can find this tutorial in Spanish here: Cómo Probar La Compresión Del Motor (GM 4.8L, 5.3L, 6.0L) (at: autotecnico-online.com).
Symptoms Of Bad Engine Compression
Low compression in one or several engine cylinders will have a direct effect on idle quality. The symptoms you'll see will be:
- Rough Idle.
- Misfire condition and misfire codes:
- P0300, P0301, P0302, P0303, P0304, P0305, P0306, P0307,P0308.
No compression in all of the cylinders will result in a cranks but does not start condition. The symptoms you'll see will be:
- No Start.
- Everything else works, for example:
- The fuel pump will activate, so you'll see fuel pressure at specification (if testing with a fuel pressure gauge).
- All of the COP coils will spark.
- If the COP ignition coils are sparking, then this indirectly proves that the crank sensor is OK too.
- The PCM will still activate all of the fuel injectors.
What Tools Do I Need?
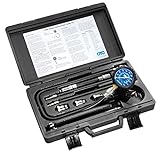
The most important tool that you're gonna' need is a compression tester. You can either rent this bad boy from your local auto parts store (Auto Zone, O'Reilly Auto Parts, Advanced Auto Parts, etc.), or you can buy one online.
Since the spark plugs need to be removed, you'll need some of the following basic tools:
- Ratchet wrench.
- 5/8'' spark plug Socket.
- Extensions for the ratchet wrench.
- Motor oil (for the 'wet compression test part).
- Spark plug wire puller.
In case you're needing to buy a compression tester and want to save money by buying it online, you can shop here:


Disclosure: As an Amazon Associate, I earn from qualifying purchases. Buying through these links helps support this site at no extra cost to you. Thanks for your support —it really means a lot!
TEST 1: Dry Compression Test
")
To get the most accurate result of the health of your engine, you should do the compression test with a slightly warmed up engine (not an engine at normal operating temperature).
Why? Well because both the engine block and the pistons and rings will expand when heated and this will have an effect on your compression tester readings.
This isn't always possible, since your particular vehicle may not start. If your engine doesn't start, you can still do the test and get very useful data that'll help you find out what's going on.
Before you start, take a look at the whole article and familiarize yourself with all of the steps. Please remember to always think safety first, since you'll be working around a cranking engine.
IMPORTANT: The engine should not be hot when removing the spark plugs! If the engine has been running for an extended period of time, let it cool down completely before removing the spark plugs.
OK, let's get this show on the road:
- 1
Disable the fuel system. You can easily do this by simply:
Removing the fuse labeled INJ 1, which is a 15 A fuse in the underhood fuse block.
Or disconnecting the fuel injectors from their electrical connectors.
Or, disconnecting the fuel pump relay.
This step is important, so don't skip it. - 2
Disable the ignition system. You can easily do this by simply:
Removing the fuse labeled INJ 1, which is a 15 A fuse in the underhood fuse block (this fuse feeds the fuel injectors and the COP coils with power).
Or disconnect the COP coils from their electrical connectors.
This step is important since it will prevent damage to the ignition coils, so don't skip it. - 3
Remove all 8 spark plugs. As you're taking them out, be careful and don't drop any of them on the floor, or you could cause the spark plug's ceramic insulator to break, and this will cause a misfire!
- 4
Install the compression tester. Thread the engine compression gauge into the spark plug hole for the number 1 engine cylinder. Hand tighten the compression gauge only! Do not use any type of tool to get it tight.
- 5
When ready, crank the engine as you observe the needle on the compression tester's gauge. Once the needle on the gauge stops climbing, have your helper stop cranking the engine.
- 6
Write down the compression value. Record this compression reading on a piece of paper. Include the number of the cylinder this reading belongs to. Now repeat steps 1 thru' 6 on the other cylinders.
- 7
Interpret the results. After testing all cylinders and having written down all of your compression test readings, now you need to interpret the results.
Let's take a look at what your test results mean:
CASE 1: You got a reading of 100 PSI or less (less being 0 PSI) on all of the cylinders. This usually means that you've got serious internal engine mechanical problems.
It's absolutely rare for the engine to get to the point of 0 PSI compression on all cylinders, but if it were to, this would usually indicate a broken timing chain.
What is common, if you have a very high mileage engine, is low compression across the board. Low usually means anything under 120 PSI (although the service manual says 100 PSI is the minimum). If your engine has reached this point, it's also smoking from the quart of oil it's burning every few days. The other symptoms you'll see is that the idle will be very rough.
CASE 2: One or two cylinders gave a low compression value. This might be normal, since each cylinder will not give the exact same pressure value.
To further investigate this, your next step is to go to: Interpreting Your Compression Test Results.
Interpreting Your Compression Test Results
If you're reading this section, then your compression test results indicate that one or more cylinders have given you a low compression value.
Up to a certain point, a low compression value may be nothing to worry about. But, if the compression value is too low, compared to the highest compression reading you got, this could be the causing a misfire problem and a misfire trouble code.
It's not unusual for the cylinders to wear out unevenly, especially on high-mileage engines or engines that didn't get a lot of maintenance.
So in this section, I'm going to explain how you can find out if that low engine compression value is causing a problem or not.
OK, you can do this one of two ways: You can calculate this 15% difference with pen and paper or you can use my low compression calculator. You can find the low compression calculator here: Online Low Engine Compression Calculator.
If you want to manually calculate the 15% difference, here's what you'll need to do:
- STEP 1: Multiply the highest compression value by 0.15 (this is the decimal value of 15%).
- STEP 2: Round the result to the nearest one (for example: 25.6 would become 26).
- STEP 3: Subtract the result (the number that was rounded) from the highest compression value.
- ANSWER: The result of this subtraction is the lowest possible compression value any cylinder can have.
Now, let me give you a more specific example: Let's say that I got the following compression values:
| Cylinder | Pressure |
|---|---|
| #1 | 165 PSI |
| #2 | 95 PSI |
| #3 | 155 PSI |
| #4 | 175 PSI |
| #5 | 165 PSI |
| #6 | 180 PSI |
| #7 | 175 PSI |
| #8 | 165 PSI |
My next step is to do the following calculation:
- STEP 1: 175 x 0.15 = 26.25.
- STEP 2: 26.25 = 26 (rounded to nearest one).
- STEP 3: 175 - 26 = 149.
- ANSWER: 149 PSI. Any cylinder with this compression (or lower) value will misfire.
Since cylinder #2 is only producing 95 PSI, I can now conclude that it's 'dead' and causing a misfire.
To find out if the lowest compression value you got from your engine compression test is within a good range, you'll need to do the same calculation. Of course, you'll need to use the highest compression value you got and not the one in the example.
Once you've found the 'dead' cylinder, the next step is to find out what's causing the low compression value. For this step, go to: TEST 2: Wet Compression Test.
TEST 2: Wet Compression Test
")
A 'Wet' compression test will help you to find out if the low cylinder pressure or pressures you recorded in the 'Dry' compression test are caused by worn piston rings or worn cylinder head valves.
The 'Wet' compression test is done exactly the same as the 'Wet' compression test, the only major and significant change is that you'll add a small amount of engine oil (about 1-2 teaspoons) to the cylinder, that had low compression, to create temporarily seal.
Depending on whether the compression pressure rises (on your compression tester) or not, you'll be able to say that the problem lies in the piston's rings or in the cylinder head valves.
OK, this is what you need to do:
- 1
Add a small amount of engine oil to the cylinder that reported low compression or no compression in the 'Dry' compression test.
The amount should be about 1 to 2 tablespoons of oil. - 2
Install the compression tester onto the cylinder.
Do not use any type of tool to tightened the compression tester. Hand tight is fine. - 3
When all is set up, have your helper crank the engine.
- 4
You'll get one of two results:
1.) The compression value will go up (from the one you recorded before).
2.) The compression value will stay the same.
Let's take a look at what your test results mean:
CASE 1: The compression value shot up. This tells you that the piston compression rings are worn out and thus the low compression problem is in the bottom end.
If you're wondering why the compression value shot up, it's because the engine oil that you added (to this low compression cylinder) helped the piston compression rings seal the compression within the cylinder. The end result being that your compression test gauge registered a higher compression value.
CASE 2: The compression value stayed the same. This confirms that the problem is in the cylinder head valves.
No, if you're wondering why this means that the cylinder head valves are worn, here's the answer: It's due to the fact that engine oil can not help worn cylinder head valves seal the compression within the cylinder. So, if the compression value did not shoot up (from the result obtained in TEST 1), then you can conclude that the problem is in the cylinder head valves of that dead cylinder.
More 4.8L, 5.3L, 6.0L Tutorials
You can find a complete list of 4.8L, 5.3L, and 6.0L test articles here: GM 4.8L, 5.3L, 6.0L Index Of Articles.
Here's a list of articles you'll find there:
- Blown Head Gasket Test.
- How To Test The Crank Sensor (at: troubleshootmyvehicle.com).
- How To Test The MAF Sensor.
- How To Test The COP Coils.
- Electronic Throttle Control Test Basics.

If this info saved the day, buy me a beer!
