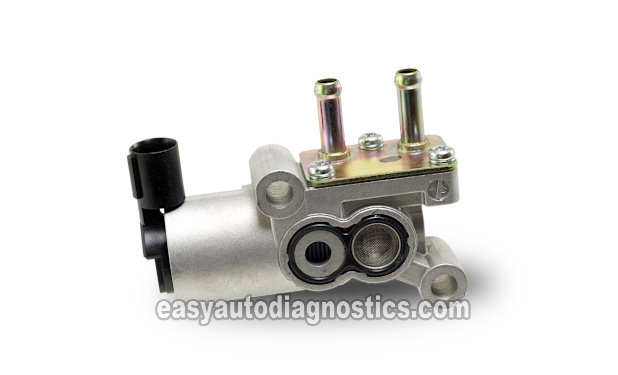
In this tutorial, I'll explain how to test the idle air control (IAC) valve on the 1997-2001 2.0L Honda CR-V.
It's a very easy test that you can do yourself and I'll explain how it's done in a step-by-step manner.
With your test result, you'll be able to find out if the IAC valve is behind the trouble code P0505: Idle Control System Malfunction lighting up the check engine light on your 2.0L Honda CR-V.
Contents of this tutorial:
![]() You can find this tutorial in Spanish here: Cómo Probar El Regulador Del Ralentí (1997-2001 2.0L Honda CR-V) (at: autotecnico-online.com).
You can find this tutorial in Spanish here: Cómo Probar El Regulador Del Ralentí (1997-2001 2.0L Honda CR-V) (at: autotecnico-online.com).
APPLIES TO: This tutorial applies to the following vehicles:
- 2.0L Honda CR-V: 1997, 1998, 1999, 2000, 2001.
What Does The Idle Air Control Valve Do?
In plain English, the idle air control (IAC) valve's job is to maintain engine idle at a specified RPM value when the engine is running.
To be a bit more specific: The idle air control valve will either increase or decrease engine RPM depending on the load placed on the engine by accessories such as the A/C compressor, power steering pump, etc.
The idle air control valve is located on the intake manifold plenum and not on the throttle body.
It has a 2-wire electrical connector that supplies it with 12 Volts and a control signal. The IAC valve control signal comes from the fuel injection computer.
When the idle air control valve fails, you'll usually see a P0505: Idle Control System Malfunction trouble code registered in the fuel injection computer's memory.
You can learn more about the P0505 trouble code here: P0505 -What Does It Mean? (1997-2001 2.0L Honda CR-V).
TEST 1: Making Sure The IAC Valve Is Getting Power

The first thing that we're gonna' do is to make sure that the IAC valve has power with the key ON but engine OFF.
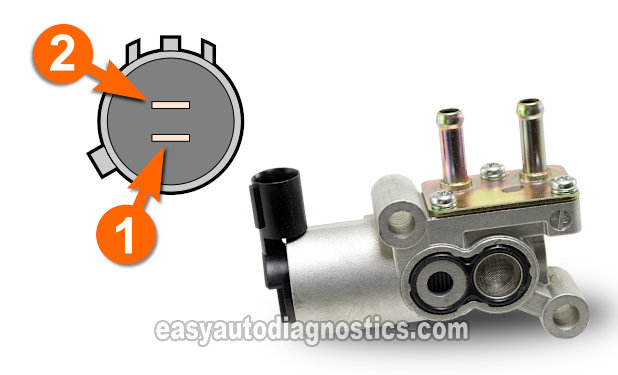
The wire that supplies the IAC valve with power is the yellow with black stripe (YEL/BLK) wire of the IAC valve's 2-wire electrical connector.
In the illustration above, the YEL/BLK wire connects to the IAC valve's male terminal labeled with the number 1.
If 10 to 12 Volts are present, then we're off to the next test (TEST 2).
These are the test steps:
- 1
Disconnect the idle air control valve from its electrical connector.
- 2
Place your multimeter in Volts DC mode.
- 3
Connect the red multimeter test lead to the yellow with black stripe (YEL/BLK) wire of the IAC valve's 2-wire electrical connector.
NOTE: If you probe the front of the connector, be careful not to damage the female terminal! - 4
Ground the black multimeter test lead on the battery negative (-) terminal.
- 5
Have a helper turn the key ON. No need to crank or start the engine.
- 6
Your multimeter should register 10 to 12 Volts DC if the IAC valve is getting power.
Let's analyze your test result:
CASE 1: 10 to 12 Volts are present in the YEL/BLK wire. This is the correct and expected test result.
Now that you've confirmed that the IAC valve is getting power, the next step is to go to: TEST 2: Testing The IAC Valve's Performance.
CASE 2: 10 to 12 Volts ARE NOT present in the YEL/BLK wire. Without power the IAC valve will not function.
Double check your multimeter test connections and repeat the test. If you still don't see 10 to 12 Volts from the YEL/BLK wire, then the most likely cause of these missing 12 Volts is an open-circuit problem in the YEL/BLK wire between the IAC valve connector and the Main relay.

