")
The MAP sensor on the 1998-2005 2.2L Chevrolet Cavalier and 2.2L Pontiac Sunfire is a 3-wire electronic component that can be easily and accurately tested with a simple multimeter to find out if it's defective or not.
In this tutorial, I'll explain how to do it in a step-by-step manner. With your test results you'll also be able to diagnose MAP sensor trouble codes P0107 and P0108.
Contents of this tutorial at a glance:
![]() You can find this tutorial in Spanish here: Cómo Probar El Sensor MAP (1998-2005 2.2L Chevrolet Cavalier) (at: autotecnico-online.com).
You can find this tutorial in Spanish here: Cómo Probar El Sensor MAP (1998-2005 2.2L Chevrolet Cavalier) (at: autotecnico-online.com).
Symptoms Of A Bad MAP Sensor
The fuel system on your 2.2L Chevrolet Cavalier or 2.2L Pontiac Sunfire is a speed density type that relies heavily on the manifold absolute pressure sensor to calculate the amount of air the engine is breathing at any given RPM.
To be a bit more specific, the fuel injection computer can calculate the correct amount of fuel to inject into the engine by calculating engine load based on intake air temperature, engine RPM, and intake manifold pressure.
So when the manifold absolute pressure (MAP) sensor fails, engine performance is definitely going to suffer.
You'll see the check engine light illuminated by one of the following trouble codes:
- DTC P0107 MAP sensor Circuit Low Voltage.
- DTC P0108 MAP sensor Circuit High Voltage.
You're also going to experience one or more of the following symptoms:
- Rough idle.
- 'Rotten egg' smell coming from the exhaust.
- Won't pass the state mandated emissions test.
- Bad gas mileage.
- Lack of power, rough idle, or hesitation.
- Engine cranks a long time before starting.
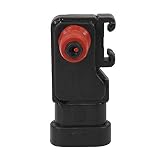
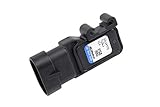
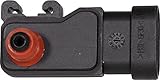
The MAP sensor is a 3-wire type sensor. This means that it has a power wire, a Ground wire and a signal wire. The table below has a brief description of each:
| Terminal | Wire | Description |
|---|---|---|
| A | BLK/WHT (1998-2001) ORG/BLK (2002-2005) |
Ground |
| B | LT GRN | MAP Signal |
| C | GRY | 5 Volts |
Where To Buy The MAP Sensor And Save
You can find the MAP sensor in just about any auto parts store. But you're going to pay a whole lot more. Especially if you want to buy the original AC Delco MAP sensor (at my local auto parts store it cost $113 and online it runs about $36). Check the following links and comparison shop.
Disclosure: As an Amazon Associate, I earn from qualifying purchases. Buying through these links helps support this site at no extra cost to you. Thanks for your support —it really means a lot!
NOTE: The manifold absolute pressure (MAP) sensors above fit the 1998, 1999, 2000, 2001, 2002, 2003, 2004, and 2005 2.2L Chevrolet Cavalier and Pontiac Sunfire.
TEST 1: Testing The MAP Sensor Voltage Signal
The MAP sensor is tested by applying vacuum to it while observing its voltage signal on a multimeter.
To go into details, we're going to connect a multimeter to the middle wire of the MAP sensor.
The next step is to apply vacuum to it with a vacuum pump (and if you don't have one then you can apply a vacuum to it with your mouth).
As vacuum is applied to the MAP sensor its voltage signal should decrease. And as you release vacuum, the voltage signal should increase back to the original value you noticed at the beginning of the test.
If the MAP sensor on your 2.2L Chevrolet Cavalier or Pontiac Sunfire is defective, its voltage signal will stay stuck in one number as you apply/release vacuum to it.
IMPORTANT: The MAP sensor must remain connected to its electrical connector for this test to work. This is due to the fact that it needs to receive 5 Volts and Ground to power up during the test. To access the voltage signal inside the wire, you'll need to use a back probe or a wire piercing probe. You can see an example of this tool here: Wire Piercing Probe.
Let's get started:
- 1
Remove the MAP sensor from the intake manifold.
- 2
Connect your vacuum pump to the MAP sensor's vacuum inlet port. Reconnect the MAP sensor to its connector if you disconnected it.
- 3
Set your multimeter's selector to Volts DC mode.
- 4
Connect the red multimeter test lead to the LT GRN wire of the MAP sensor's connector. This wire is identified by the letter B in the photo above.
Remember, the MAP sensor must remain connected to its 3-wire connector. - 5
Ground the black multimeter test lead directly on the battery negative (-) terminal.
- 6
Turn the key ON but don't start the engine. This will power up the MAP sensor and you should see a reading of 4.7 Volts DC on your multimeter.
- 7
Now, apply vacuum to the MAP sensor with the vacuum pump (or your mouth). The voltage signal value should decrease.
If you're using a vacuum pump: At 5 in.Hg → 3.9 Volts. At 10 in.Hg → 3 Volts. At 15 in.Hg → 2.1 Volts. At 20 in.Hg → 1.2 Volts. - 8
Release the vacuum. Once released, your multimeter should show the original voltage value.
Repeat this test step several times making sure that each time the voltage decreases/increases as you apply/release vacuum.
Let's take a look at what your test results mean:
CASE 1: The MAP voltage signal decreased and increased as you applied and released vacuum. This is the correct and expected test result. With this result you can correctly conclude that the MAP sensor is working correctly (not defective).
You can also conclude that the manifold absolute pressure (MAP) sensor is receiving 5 Volts DC and Ground from the fuel injection computer. No further testing of the MAP sensor is required.
CASE 2: The MAP voltage signal DID NOT decrease/increase as you applied and released vacuum. You can usually conclude that the MAP sensor defective when its voltage signal does not decrease/increase as you apply/release vacuum to it.
But in some cases this test result is caused by the MAP sensor not receiving either 5 Volts DC or Ground from the fuel injection computer. So the next step is to make sure that it is getting power and Ground. For this test go to: TEST 2: Verifying MAP Sensor Has 5 Volts And Ground.
CASE 3: The multimeter DID NOT register any voltage. You can usually conclude that the MAP sensor defective when its voltage signal does not decrease/increase as you apply/release vacuum to it.
But in some cases this test result is caused by the MAP sensor not receiving either 5 Volts DC or Ground from the fuel injection computer. So the next step is to make sure that it is getting power and Ground. For this test go to: TEST 2: Verifying MAP Sensor Has 5 Volts And Ground.
