Testing the compression of your 2.6L Isuzu is not hard to do. In this 'how to' tutorial, I'll show you how to do it and more importantly, how to interpret the results of the test.
Why do an engine compression test? Well, it will help you in two specific scenarios:
- A hard to diagnose engine miss (misfire).
- You might have already replaced a ton of stuff (spark plugs, wires, fuel injectors, etc) and the engine is still missing. The problem may just be a cylinder with very low compression.
- A 'cranks but does not start' condition.
- An engine with no compression will not start.
Contents of this tutorial:
![]() You can find this tutorial in Spanish here: Cómo Probar La Compresión Del Motor (2.6L Isuzu Pick Up, Amigo, Rodeo) (at: autotecnico-online.com).
You can find this tutorial in Spanish here: Cómo Probar La Compresión Del Motor (2.6L Isuzu Pick Up, Amigo, Rodeo) (at: autotecnico-online.com).
Important Tips And Suggestions
TIP 1: Engine temperature is an important factor in the getting the most accurate result from your compression test (if your vehicle starts and runs).
I suggest that you perform the compression test with a slightly warmed up engine. My recommendation is to let a completely cold engine run for about 15 minutes and no more.
TIP 2: If your vehicle DOES NOT start and run then the above suggestion does not apply to you.
TIP 3: Take all necessary safety precautions as you do the compression test, since the test has to be done with the engine cranking. Think safety all of the time.
TIP 4: All of the spark plugs need to be removed from the engine for the compression test and this must never be done with a hot engine.
Why? The spark plug threads in the cylinder head can easily get damaged (as in getting stripped) and this is a nightmare you do not want to experience.
Which Compression Tester Should I Buy?
There are lot of engine compression testers to choose from and many places to buy them. I'm gonna' make some recommendations to you:
Disclosure: As an Amazon Associate, I earn from qualifying purchases. Buying through these links helps support this site at no extra cost to you. Thanks for your support —it really means a lot!
TEST 1: Dry Compression Test

OK, we're ready to get this show on the road.
Before I forget, let me tell you that you should test each cylinder twice before moving on to test the next one.
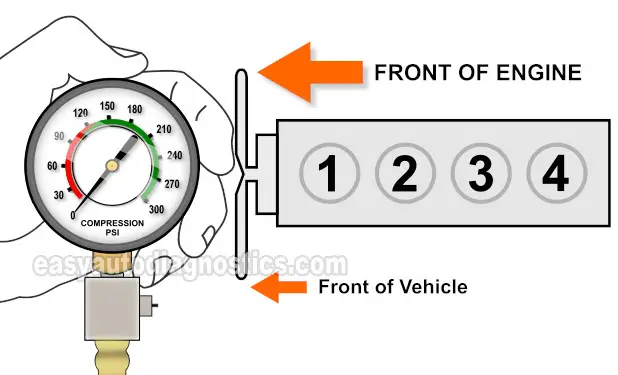
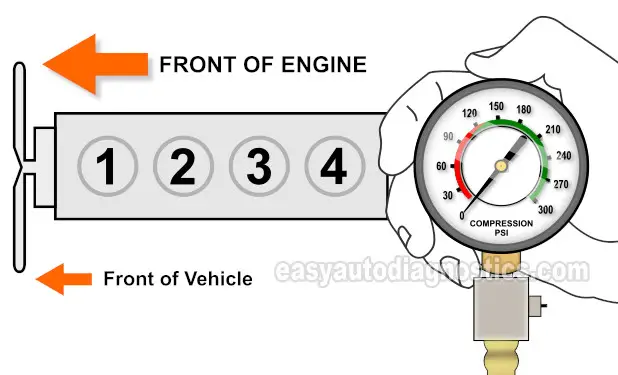
Also, it's important that you write down what the compression value is for every cylinder. The illustration above will help you to identify the number of each cylinder.
OK, this is what you'll need to do:
- 1
Remove the spark plugs from a slightly warmed up engine (if it starts and runs). Remember, the engine can not be hot.
When removing the spark plugs, be careful not to drop any of them on the floor, or you run the risk of having the spark plugs porcelain insulator crack and then you'll have a misfire on your hands.
If the engine does not start then don't worry about it being warmed up. - 2
Disable the fuel system by removing the fuel pump fuse. Disabling the fuel system will prevent fuel from being injected into each cylinder when the test is performed.
- 3
Disable the ignition system by disconnecting the distributor's electrical connectors.
Disabling the ignition system is also very important, since it'll prevent damage to the ignition coil when the engine is being cranked. - 4
Thread the engine compression gauge into the spark plug hole for the number 1 engine cylinder. Hand tighten the compression gauge only! Do not use any type of tool to get it tight.
- 5
Have your helper crank the engine till the needle on the compression gauge stops climbing.
Now, record on paper the value at which the needle stopped and the number of the engine cylinder on a piece of paper. Release the pressure on the gauge and repeat this step one more time.
Repeat this test step on the remaining 3 cylinders.
Let's take a look at what your test results mean:
CASE 1: You got 0 PSI on all 4 cylinders. This is not good and it indicates the engine has suffered one of the following conditions:
- Broken timing belt.
- Blown head gasket.
- Blown engine.
Any compression value below 100 PSI (even if it does not 0 PSI) means internal mechanical engine trouble.
CASE 2: The compression values are slightly different from one another. Up to a certain point this could be normal.
What is NOT normal is if the values vary too much. The cool thing is that we can find out if the variations in the values, you wrote down, indicate a problem (with that cylinder) or not. Go to: Interpreting Your Compression Test Results.
Interpreting Your Compression Test Results
If you've made it to this section, it's because your compression test results showed that one or more cylinders are running lower than the rest.
A small drop in compression isn't always a red flag. But when the difference is too big compared to the strongest cylinder, that drop can cause a rough idle, a misfire, or even trigger a misfire trouble code.
Uneven wear between cylinders is pretty common, especially on high-mileage engines or engines that haven't been maintained regularly.
So the question now is: how do you know if that low number is actually a problem? That's what I'll walk you through here.
You've got two options: either do the math with pen and paper, or use my free online calculator to save time. You can find it here: Online Low Engine Compression Calculator.
If you'd rather work it out manually, here's how:
- STEP 1: Multiply the highest compression value by 0.15 (this gives you 15%).
- STEP 2: Round that result to the nearest whole number (for example, 25.6 becomes 26).
- STEP 3: Subtract this number from your highest compression value.
- ANSWER: The final result is the lowest acceptable compression reading. Any cylinder below this value is considered too low.
Let me show you how this looks with real numbers. Here's a sample set of compression readings I got:
| Cylinder | Pressure |
|---|---|
| #1 | 165 PSI |
| #2 | 95 PSI |
| #3 | 155 PSI |
| #4 | 175 PSI |
My next step is to do the following calculation:
- STEP 1: 175 x 0.15 = 26.25.
- STEP 2: 26.25 = 26 (rounded to nearest one).
- STEP 3: 175 - 26 = 149.
- ANSWER: 149 PSI. Any cylinder with this compression (or lower) value will misfire.
With cylinder #2 showing only 95 PSI, it's clear that this cylinder is effectively 'dead' and the source of the misfire.
To determine if one of your cylinders is also too low, you'll need to run the same calculation using the highest compression value from your own test (not the numbers in my example).
Once you've identified the weak cylinder, the next step is to figure out why the compression is low. For that, move on to: TEST 2: Wet Compression Test.
TEST 2: Wet Compression Test

The very last step, if you have one or more cylinders that have very low compression values, is to do a wet compression test on those specific cylinders.
This type of test will help you find out if the low compression value is due to worn valves in the cylinder head or worn rings on the pistons.
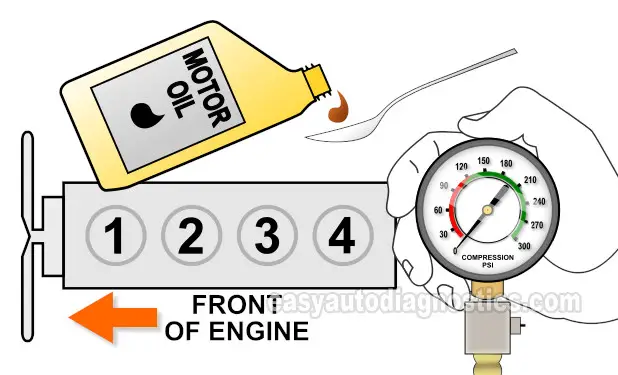
This involves adding a spoonful of engine oil to the affected cylinder and testing the compression again.
OK, this is what you'll need to do:
- 1
Add a tablespoon of engine oil in the cylinder you need to retest. I suggest using a small and long funnel so that the oil will reach the inside of the cylinder.
- 2
Once you've added the oil, install the compression gauge, and as before just hand tighten it.
- 3
Now, have your helper crank the engine.
- 4
Once the needle stops climbing on the compression gauge stop cranking the engine.
- 5
You'll see one of two results:
1.) The needle will climb higher than the previous compression number you recorded for this specific cylinder.
2.) The needle will not move at all or stay at the same number you recorded earlier.
Whatever value your compression tester reads, write it down again. - 6
Repeat steps 1 thru' 4 on any other cylinder with low or 0 PSI compression.
Let's take a look at what your compression test results mean:
CASE 1: The needle on the gauge registered a higher value. This tells you that the lack of compression (or low compression) recorded earlier is due to bad or severely worn piston rings.
CASE 2: The needle DID NOT move beyond the previous recorded value. This result tells you that the problem is due to worn intake or exhaust valves in the cylinder head.
Related Test Articles
To see all of the 2.6L Isuzu specific articles here at troubleshootmyvehicle. Com, go to: Isuzu 2.6L Index Of Articles.
Here's a sample of the articles, you'll find in the Index of Articles:
- 2.6L Isuzu MAF Sensor Test Amigo, Pick Up, Rodeo (1993-96).
- Blown Head Gasket Test Amigo, Pick Up, Rodeo (1993-96 Isuzu 2.6L).
- How To Test The Fuel Injectors (2.6L Isuzu Pick Up).
- Testing A Bad Alternator: Symptoms And Diagnosis.
- How To Bench Test The Starter Motor.

If this info saved the day, buy me a beer!


