TEST 2: Engine Compression Shooting Out Of Radiator

This second test checks to see if exhaust gases and/or combustion pressure is escaping thru' the radiator
IMPORTANT: If the engine is hot, let it cool down for about an hour before you attempt this particular test. Please take all necessary safety precautions.
Alright, this is what you need to do:
- 1
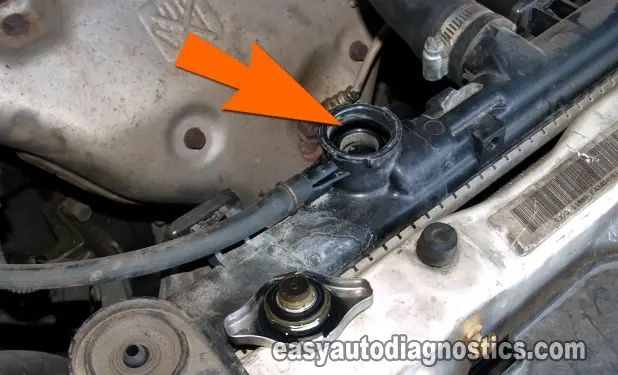
Remove the radiator's cap.
- 2
Check the coolant level.
If the radiator is low, add water or coolant to fill it up. - 3
Have a helper crank the engine while you stand at a safe distance from the radiator.
- 4
You'll see one of two things:
1.) The water or coolant inside the radiator will shoot up and out of the now open radiator.
2.) The coolant will not be disturbed. In other words, cranking the engine will have no effect on the level of the water or coolant in the radiator.
OK, now that the testing part is done, let's take a look at what your results mean:
CASE 1: The coolant bubbled out or shot out from the radiator. This test result confirms that you do have a blown head gasket on your vehicle.
You can stop here, since no further testing is required.
CASE 2: The coolant DID NOT bubble out NOR shoot out from the radiator. If cranking the engine had no visible effect on the level of the coolant in the open radiator then this is normal. You now have two decisions to make, depending on how the engine idles and they are:
- If your vehicle starts and runs and idles smoothly but overheats for no apparent reason, go to: TEST 4: Using A Chemical Block Tester (Combustion Leak Tester).
- If your vehicle does not start or starts and runs with a severe misfire, your next step is to check to see if the head gasket has burned between two cylinders. Go to, TEST 3: Engine Compression Test.
TEST 3: Engine Compression Test

On some occasions, the head gasket will get burned between two cylinders, causing a gap that will let the compression/combustion of one cylinder to leak into the other and vice-versa.
The way to verify this, is to do a compression test, and in this test step I'll show you how and more importantly, how to interpret the compression test results to see if the head gasket is burned or not.
These are the test steps:
- 1
Disconnect the ignition coil and the fuel injectors from their electrical connectors.
IMPORTANT: This will disable the ignition system and fuel system. This first step is important. - 2
Remove the spark plug wires.
- 3
Remove all four spark plugs.
- 4
Thread in the compression tester on the first spark plug hole you're gonna' start with.
- 5
Have a helper crank the engine while you observe the compression tester's needle.
- 6
Once the needle on the gauge stops climbing, have your helper stop cranking the engine.
Write down the reading and what cylinder it applies to. - 7
Repeat the above steps in the remaining 3 cylinders.
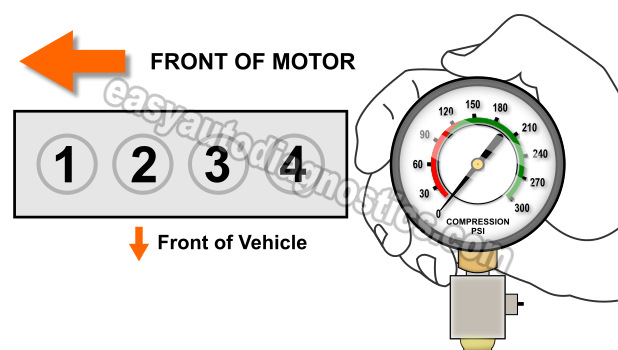
If the head gasket has burned at a location between 2 cylinders then you're going to have 2 good compression readings and 2 compression readings that will be 0 PSI. Let me give you a more specific example:
Let's say that my car gave me the following cylinder compression readings:
- Cylinder #1 = 175 PSI
- Cylinder #2 = 165 PSI
- Cylinder #3 = 0 PSI
- Cylinder #4 = 0 PSI
As you can see from the above compression readings, cylinders #3 and #4 have 0 PSI readings. And this is a clear indication that the head gasket has burned at the point between them both. Now, in your specific case you may not see those exact same cylinders with 0 PSI readings. It may be #1 and #2 or it may be #2 and #3, the main idea is that whatever cylinders are affected, they will always be side by side.
CASE 1: All cylinder compression readings where normal. This tells you that the head gasket is OK.
OK, 3 out of 3 tests have confirmed that the head gasket on your vehicle is not blown.
CASE 2: Two side by side cylinders had 0 PSI compression. This engine compression reading confirms that the head gasket is burned thru' at the point between those two cylinders.
