")
In this tutorial, I'll explain how to test the MAP sensor, on the 2002, 2003, and 2004 2.4L Honda CR-V, with a multimeter. All of the test steps are explained in a step-by-step manner.
This test is so accurate that you'll be able to find out if your Honda CR-V's MAP sensor is defective (or not) without having to swap it out with a known good one.
Contents of this tutorial at a quick glance:
![]() You can find this tutorial in Spanish here: Cómo Probar El Sensor MAP (2002-2004 2.4L Honda CR-V) (at: autotecnico-online.com).
You can find this tutorial in Spanish here: Cómo Probar El Sensor MAP (2002-2004 2.4L Honda CR-V) (at: autotecnico-online.com).
Symptoms Of A Bad MAP Sensor
The fuel system on your 2.4L Honda CR-V is a 'speed-density' fuel system.
This means that the computer needs to know the intake air temperature, engine RPMs, and the intake manifold pressure to calculate the amount of air entering your CR-V's 2.4L engine.
Once the fuel injection computer has calculated the amount of air entering the engine, it can now calculate the correct amount of fuel to inject.
So as you've already guessed, it's your Honda CR-V's MAP sensor's job to measure the amount of intake manifold vacuum.
Since the MAP sensor is a key component of fuel injection system, when it fails you're gonna' see the check engine light lit up by one of the following trouble codes:
- DTC P0107 MAP Sensor Circuit Low Voltage.
- DTC P0108 MAP Sensor Circuit High Voltage.
- DTC P1128 MAP Sensor Signal Lower Than Expected.
- DTC P1129 MAP Sensor Signal Higher Than Expected.
You'll also see one or more of the following symptoms:
- Rough idle.
- ‘Rotten egg' smell coming from the exhaust.
- Won't pass the state mandated emissions test.
- Bad gas mileage.
- Lack of power, rough idle, or hesitation.
- Engine cranks a long time before starting.
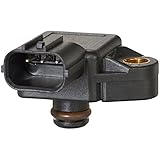
As you've probably already noticed, your Honda CR-V's MAP sensor has 3 wires coming out of its electrical connector. The table below has a brief description of each:
| Terminal | Wire | Description |
|---|---|---|
| 1 | YEL/RED | 5 Volts |
| 2 | GRN/RED | MAP Signal |
| 3 | GRN/WHT | Ground |
Where To Buy The MAP Sensor And Save
The following links will help you comparison shop for your 2.4L Honda CR-V's MAP sensor. I think they'll save you some bucks:


Disclosure: As an Amazon Associate, I earn from qualifying purchases. Buying through these links helps support this site at no extra cost to you. Thanks for your support —it really means a lot!
NOTE: If you're not sure if the above MAP sensor fits your particular 2.4L Honda CR-V, don't worry. Once you get to the site they'll make sure the MAP sensor fits. If it doesn't, they'll find you the right one.
TEST 1: Testing The MAP Sensor Voltage Signal
")
")
What we're gonna' do, to find out if the MAP sensor is defective (or not), is to apply vacuum to the sensor using a vacuum pump while having a multimeter connected to the MAP signal wire (GRN/RED wire).
During the test we'll have the MAP sensor connected to its electric connector (since we need the fuel injection computer to provide it with 5 Volts and Ground).
As we apply vacuum to the MAP sensor, the MAP sensor's voltage signal should decrease. If the MAP sensor is defective, you won't see the MAP signal voltage react to the vacuum being applied to it.
Don't worry, this is a very simple and easy test.
If you don't have a multimeter and need to buy one, check out my recommendations here: Buying A Digital Multimeter For Automotive Diagnostic Testing.
IMPORTANT: The MAP sensor needs to stay connected to its electrical connector for this test to work. You'll need to use a back-probe or a wire-piercing probe to measure the MAP signal voltage. To see what a wire-piercing probe looks like, go here: Wire Piercing Probe.
Let's get started:
- 1
Remove the MAP sensor from the intake manifold.
- 2
Connect your vacuum pump to the MAP sensor's vacuum inlet port. Reconnect the MAP sensor to its connector if you disconnected it.
- 3
Set your multimeter's selector to Volts DC mode and with the red test lead, probe the GRN/RED wire of the MAP sensor's connector.
Remember, the MAP sensor must remain connected to its 3 wire connector. - 4
Ground the black multimeter test lead directly on the battery negative (-) terminal.
- 5
When everything is ready, turn the key ON but don't start the engine. This will power up the MAP sensor and you should see a reading somewhere between 2.9 to 4.5 Volts DC on your multimeter.
Now, apply vacuum to the MAP sensor with the vacuum pump (or your mouth). The voltage signal value should decrease.
Release the vacuum. Once released, your multimeter should show the original voltage value.
Repeat this test step several times making sure that each time the voltage decreases/increases as you apply/release vacuum.
Let's take a look at what your test results mean:
CASE 1: The MAP voltage signal decreased and increased as you applied and released vacuum. This is the correct test result and it tells us that your 2.4L Honda CR-V's MAP sensor is functioning correctly.
CASE 2: The MAP voltage signal DID NOT increase (and/or decrease) as you applied and released vacuum. This test result usually indicates that your CR-V's MAP sensor is defective.
To be sure that the MAP sensor is defective, we need to make sure that it's getting power and Ground. For these two tests go to: TEST 2: Verifying MAP Sensor Has 5 Volts And Ground.
CASE 3: The multimeter DID NOT register any voltage. This test result usually indicates that your CR-V's MAP sensor is defective or isn't getting power (or Ground).
The next step is to see if your CR-V's MAP sensor is getting power and Ground. For these two tests go to: TEST 2: Verifying MAP Sensor Has 5 Volts And Ground.