STEP 2: Feeding Power And Ground To The Starter Motor

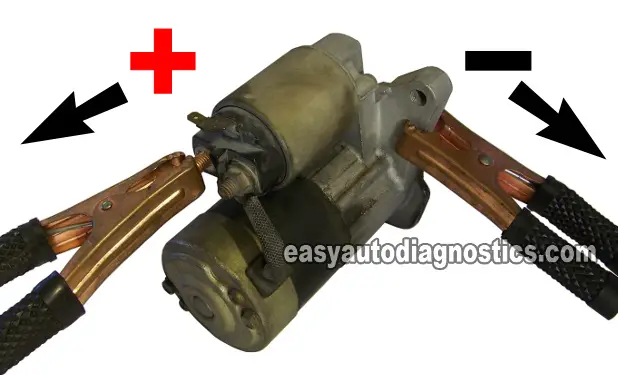
Attach one jumper cable to the battery negative (-) terminal. Attach the other end of that same cable to the starter motor case as shown on the photo above.
Attach the remaining jumper cable to the battery positive (+) terminal. Attach the other end of this same cable to the stud on the starter motor solenoid to which the battery cable is attached to as shown on the photo above.
STEP 3: Applying 12 Volts To The S Terminal

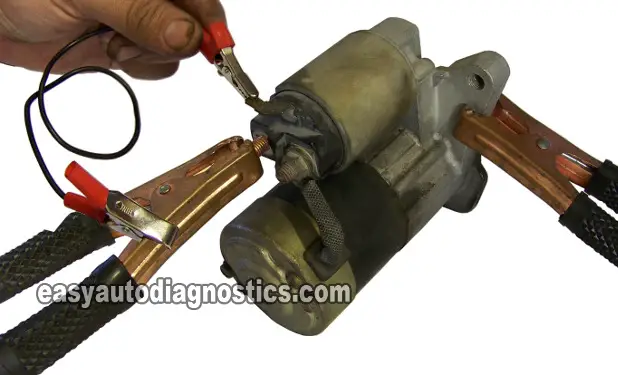
Attach one end of the jumper wire to the jumper cable that you have just connected to the starter solenoid.
If you don't have the starter motor in a vise, have someone or something hold it firmly (watch-out for the spinning pinion gear!). When you're ready, with the other end of the jumper wire you're gonna' touch the starter solenoid Terminal to which the Start/Crank wire is attached to.
So, once you have everything set up, touch the starter solenoid Start/Crank terminal with the jumper wire and observe/hear the results.
Interpreting The Results
You're only gonna' get one of three results from bench testing the starter motor. They pretty much boil down to: Either the starter motor will come out to play or not. More specifically:
- The starter motor will work and the starter motor pinion gear will come out and spin fast and freely. If this happens, the starter motor is good.
- The starter motor pinion gear will come out and spin very but very slowly. If this happens, the starter motor is bad.
- Or you're only gonna' hear a loud click, and nothing more. This result lets you know that the starter motor is bad.
Is The Engine Locked Up?
I recommend the following case study of a vehicle with a NO-CRANK condition. The vehicle owner thought it was a case of a bad starter motor, but the cause was something else entirely (engine threw a rod).

If this info saved the day, buy me a beer!

