TEST 4: Triggering Signal Test
OK, you're here because you have confirmed that the ignition coil is not sparking, has 12 Volts and Ground. The next step is to verify that that ignition coil is receiving the Triggering signal from the fuel injection computer.
Testing for the Triggering signal should be done with the ignition coil connected to its connector. The method I recommend to use is with it connected to its connector and using a wire-piercing probe to test for the signal (to see what this tool looks like, click here: Wire-Piercing Probe.
These are the test steps:
- 1
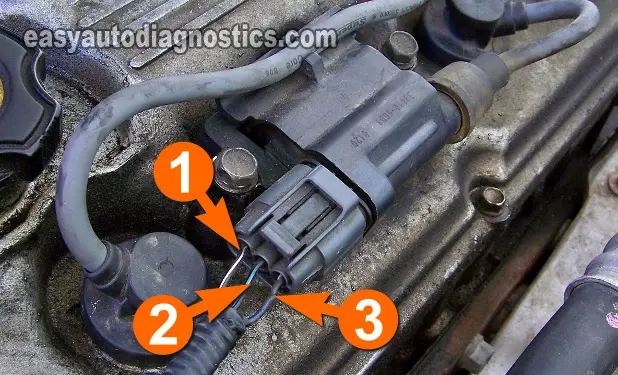
Remove enough of the plastic tube that covers the ignition coil's 3 wires to expose them for testing.
- 2
Put the multimeter in Hertz (Hz) mode.
- 3
Connect the red multimeter test lead to the battery positive (+) terminal.
- 4
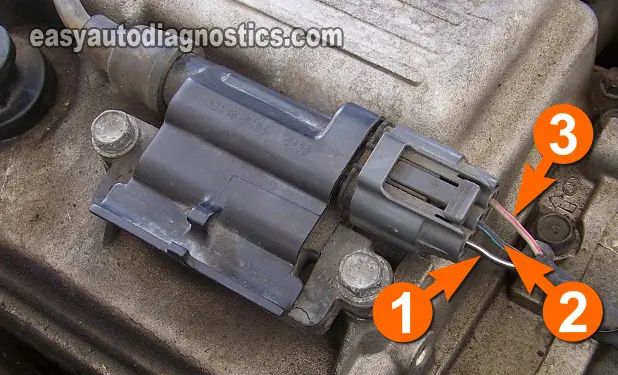
Connect the black multimeter test lead to the wire labeled with the number 3 (see photo in image viewer) using an appropriate tool to pierce the wire.
- 5
Have your helper crank the engine while you observe the multimeter.
- 6
You should see fluctuating values of 2 to 20+ Hertz as the engine cranks and (possibly starts) on your multimeter.
Let's take a look at what your test result means:
CASE 1: The multimeter registered a fluctuating 2 to 20+ Hertz (Hz) as the engine cranked and started. This is the correct test result and it confirms that the ignition coil is receiving its activation signal.
You can conclude that this particular ignition coil is bad (and needs to be replaced) if you have:
- Confirmed that the ignition coil is not firing spark from it's spark plug wire and spark plug boot (TEST 1).
- Confirmed that the ignition coil is receiving 10 to 12 Volts (TEST 2).
- Confirmed that the ignition coil is receiving Ground (TEST 3).
- Confirmed in this test section that the ignition coil is receiving its activation signal (Triggering signal).
CASE 2: The multimeter DID NOT register a fluctuating 2 to 20+ Hertz (Hz) as the engine cranked and started. Re-check all of your connections and repeat the test again.
If still no Hertz readings, then this results eliminates the ignition coil as the source of the no-spark or misfire problem, since without the Triggering signal the ignition coil will not work.
TEST 5: Testing For Spark At The Ignition Coil
IMPORTANT: Proceed with this test if you got a NO spark result from the spark plug wire (high tension wire) attached to the coil-On-Plug (C.O.P.) ignition coil in TEST 1.
IMPORTANT: The ignition coil has to be in its place and bolted to the valve cover for this test.
Let's get started:
- 1
Disconnect the spark plug wire (that did not fire off spark) from the ignition coil.
- 2
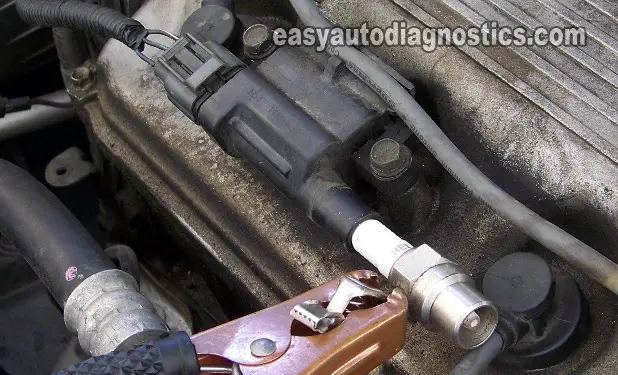
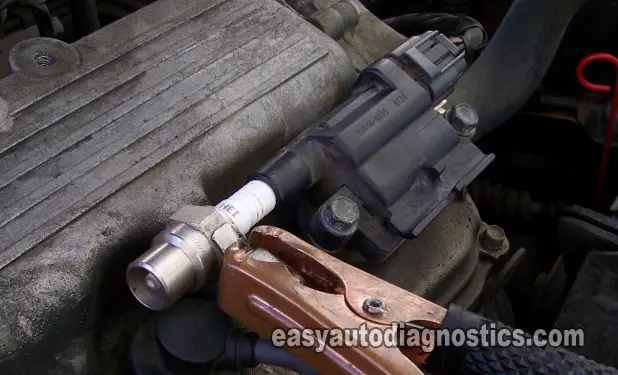
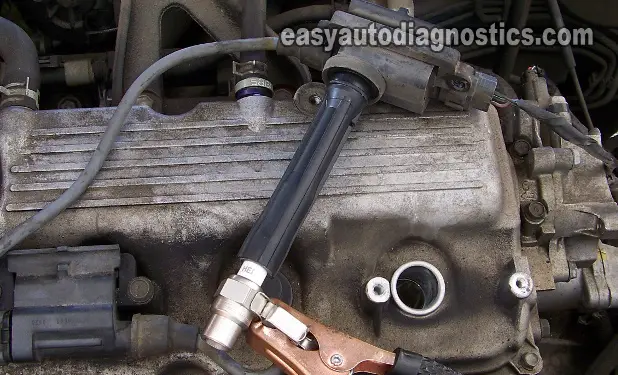
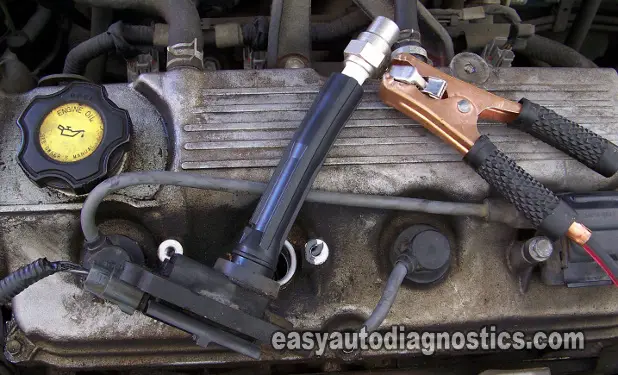
Place the spark tester directly on the ignition coil in place of the spark plug wire you just removed (see photos in the image viewer).
- 3
Ground the spark tester directly on the battery negative (-) terminal with a battery jump start cable.
- 4
Have your assistant crank the engine. The engine may start, so be careful.
- 5
You're gonna' get one of two results: Spark or no spark.
Let's take a look at what your test result means:
CASE 1: You got spark. This is the correct and expected test result.
You can conclude that the spark plug wire is bad and needs to be replaced if you have:
- Confirmed that the spark plug wire did not spark (TEST 1).
- Confirmed that the spark plug boot (of this particular ignition coil) did spark (TEST 1).
- Confirmed that the ignition coil's tower did spark in this test section.
CASE 2: You got NO spark. You can conclude that the ignition coil is bad only if you have:
- Confirmed that the spark plug wire did not spark (TEST 1).
- Confirmed that the spark plug boot (of this particular ignition coil) did spark (TEST 1).
- Confirmed that the ignition coil's tower DID NOT spark in this test section.
Replacing the ignition coil will solve the misfire condition and the misfire code lighting up the check engine light (CEL) on the instrument cluster.
TEST 6: Testing For Spark At The Ignition Coil
IMPORTANT: Proceed with this test if you got a NO spark directly from the Coil-On-Plug (C.O.P.) ignition coil in TEST 1.
Let's get started:
- 1
Remove the ignition coil from its place on the valve cover.
IMPORTANT: To perform this test the ignition coil must remain connected to its connector and to the spark plug wire that connects to it. - 2
Place the spark tester directly on the ignition coil's spark plug boot (see the photos in the image viewer).
- 3
Ground the spark tester directly on the battery negative (-) terminal with a battery jump start cable.
- 4
Have your assistant crank the engine. The engine may start, so be careful.
- 5
You're gonna' get one of two results: Spark or no spark.
Let's take a look at what your test result means:
CASE 1: You got spark. This is the correct test result and it lets you know that the ignition coil is good.
If the engine is misfiring, take a look at the section: TEST 7: Misfire Due To Carbon Tracks for other possible causes of a misfire.
CASE 2: You got NO spark. You can conclude that the ignition coil is bad only if you have:
- Confirmed that the spark plug wire is firing spark (TEST 1).
- Confirmed that the spark plug boot (of this particular ignition coil) DID NOT spark (TEST 1).
- Confirmed, in this test section, a no-spark test result from the ignition coil's boot.
Replacing the ignition coil will solve the misfire condition and the misfire code lighting up the check engine light (CEL) on the instrument cluster.

