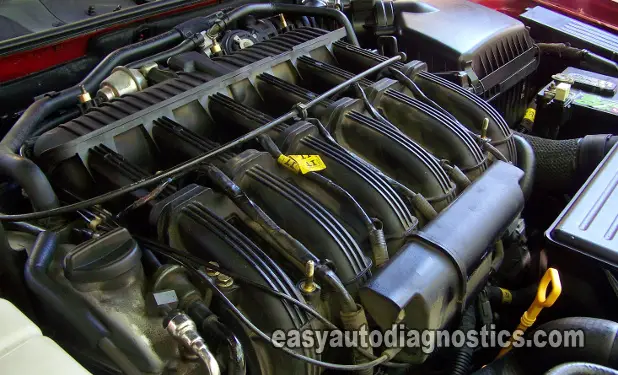
This is a very simple test that'll let you know if a Coil-On-Plug ignition coil or several of them on your Suzuki Verona have fried and are causing a misfire condition. The test itself is accomplished in several easy steps.
Below you're gonna' find some very useful information that will help you with your tests, so take a look at the following paragraphs.
Contents of this tutorial:
- Common Symptoms Of A Bad Coil-On-Plug Ignition Coil.
- What Tools Do I Need?
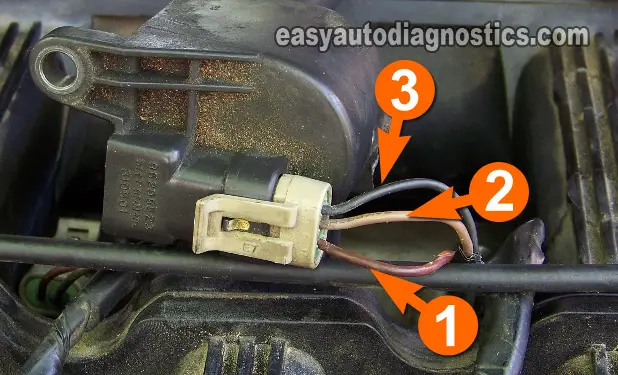
- Circuit Descriptions Of The C-O-P Ignition Coil Connector.
- TEST 1: Testing For Spark.
- TEST 2: Testing The Power (12 V) Circuit.
- TEST 3: Testing The Ground Circuit.
- TEST 4: Testing For The Triggering Signal.
- TEST 5: Checking For Carbon Tracks.
This info applies to the 2004, 2005 Suzuki Verona with the 2.5L L6 cylinder engine. If you need to read a primer on how to test Coil-On-Plug Ignition Coils that are not covered by this article, read: Testing And Troubleshooting 3 Wire COP Ignition Coils.
Common Symptoms Of A Bad Coil-On-Plug Ignition Coil
This is not the most definitive list on the subject, but does cover the majority of symptoms I've seen on this type of ignition system:
- Misfire codes that light up the check engine light (CEL) on your instrument cluster.
- Engine misfire that DOES NOT light up the check engine light (CEL).
- Smell of unburned gasoline coming out of the tailpipe.
- Rotten egg smell coming out of the tailpipe. This is due to the unburned gasoline from the misfiring cylinder over loading the catalytic converter.
- Really bad gas mileage.
- Lack of power as you accelerate the vehicle down the road.
What Tools Do I Need?
A scan tool (automotive diagnostic scanner) is not needed. Even if you suspect a misfire, you don't need a scan tool to find out which cylinder is the one that is misfiring. You can perform the cylinder balance test yourself on your Suzuki Verona, TEST 1 will help you with this. You'll need:
- An HEI spark tester.
- Battery jump start cables.
- A digital multimeter.
- This multimeter must be able to read Hertz frequency.
- A helper.
- You'll need someone to help you crank the engine while you perform the tests in the engine compartment.
- A repair manual.
- For whatever remove and replace info you'll need that is not covered by this article.
Circuit Descriptions Of The C-O-P Ignition Coil Connector

OK, to test the Coil-On-Plug ignition coils on your Suzuki Verona, you need to know what each wire (circuit) does in the connector. Here are the circuit descriptions:
- Circuit labeled 1:
- Power (12 V) Circuit.
- Circuit labeled 2:
- Trigger Signal Circuit.
- Circuit labeled 3:
- Ground Circuit.
The above circuit descriptions are shared by all of the six Coil-On-Plug ignition coils on your Suzuki Verona. So, whether you're testing the number 1 cylinder ignition coil or the number 4 cylinder ignition coil (or whichever ignition coil), the above info applies.
To test these circuits, it's not necessary to unplug the ignition coil's connector therefore, I recommend testing for each signal with the connector connected. Also, using a wire-piercing probe is the most effective and easy way of getting to the signal. If you need to see what this tool looks like, click here: Wire Piercing Probe.
TEST 1: Testing For Spark

This a pretty straight forward test, but one that has to be done with the HEI spark tester. Here are a couple suggestions that'll help you to avoid wasting money and time (by not replacing a good part):
- Do not use a regular spark plug instead of a dedicated spark tester. The result you may get from using a regular spark plug IS NOT trustworthy.
- Do not pull the ignition coil off of its spark plug, as the engine is running, to see/hear if it's sparking. This method can ruin/fry the ignition coil and now you've got another problem on your hands.
- I don't recommend using any other type of spark tester. Buy the HEI spark tester, not an imitation or something similar.
OK, now on with the show, I'm gonna' assume that you don't know which cylinder is the one that is misfiring or with the bad ignition coil or coils, so the very first thing that has to be done is to:
- 1
Remove the first Coil-On-Plug Ignition Coil
Which one? it doesn't matter since you're gonna' test them all). - 2
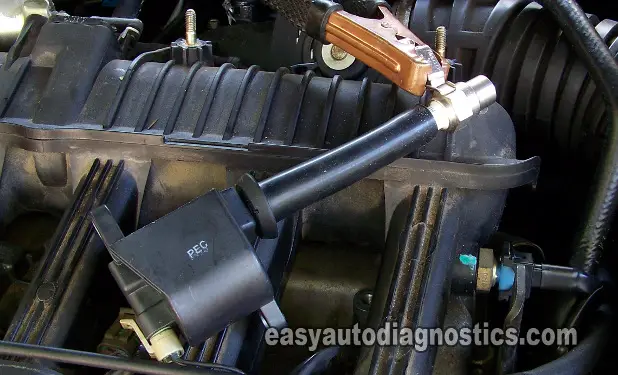
Attach the HEI spark tester (or an equivalent spark tester) to the ignition coil (as shown in the photo above).
- 3
Connect the HEI spark tester to the battery negative (-) post using a battery jump start cable.
- 4
Have your helper crank the engine while you observe the spark tester.
- 5
The spark tester should spark the entire time the engine is cranking.
- 6
Disconnect the spark tester and put the ignition coil back in place.
- 7
Repeat steps 1 thru 5 on the remaining ignition coils.
Let's interpret your test results:
CASE 1: You got spark from all of the Coil-On-Plug ignition coils. This is the correct test result and it lets you know the ignition coils are good. The cause of the misfire is something else. Go to TEST 5.
CASE 2: You got spark from some but NOT all of the Coil-On-Plug ignition coils. This test result tells you that the ones that did not fire off spark are probably bad.
To make sure you need to verify that the ignition coil (the one that did not spark) is receiving 12 Volts and the Triggering Signal. Go to: TEST 2: Testing The Power (12 V) Circuit.
CASE 3: You got NO spark from none of the Coil-On-Plug ignition coils. This test result usually means the cause of your Suzuki's NO-START condition is not due to the ignition coils.
It is rare (next to impossible) for all of the ignition coils to go bad at the exact same time. Testing this condition is beyond the scope of this article but possible causes could be a bad crankshaft position sensor, bad ignition switch, etc.

